The purpose of this article is to show you how to update the main photos on your home page, step-by-step. You will learn how to add photos by either uploading your own or choosing from our global stock image gallery. Additionally, you'll learn how to remove a photo from your home page.
Using the Image Rotator Editor
You can update the main photos on your home page in a few simple steps using the Image Rotator Editor. Here, you can add photos to the rotation, remove a photo, or update several settings related to your photo rotation.
To access the Image Rotator Editor:
1) Point your mouse over the photo rotator on your home page and click. A popup menu will open
2) Click on Edit This Content in the popup menu. This opens the Image Rotator Editor popup.
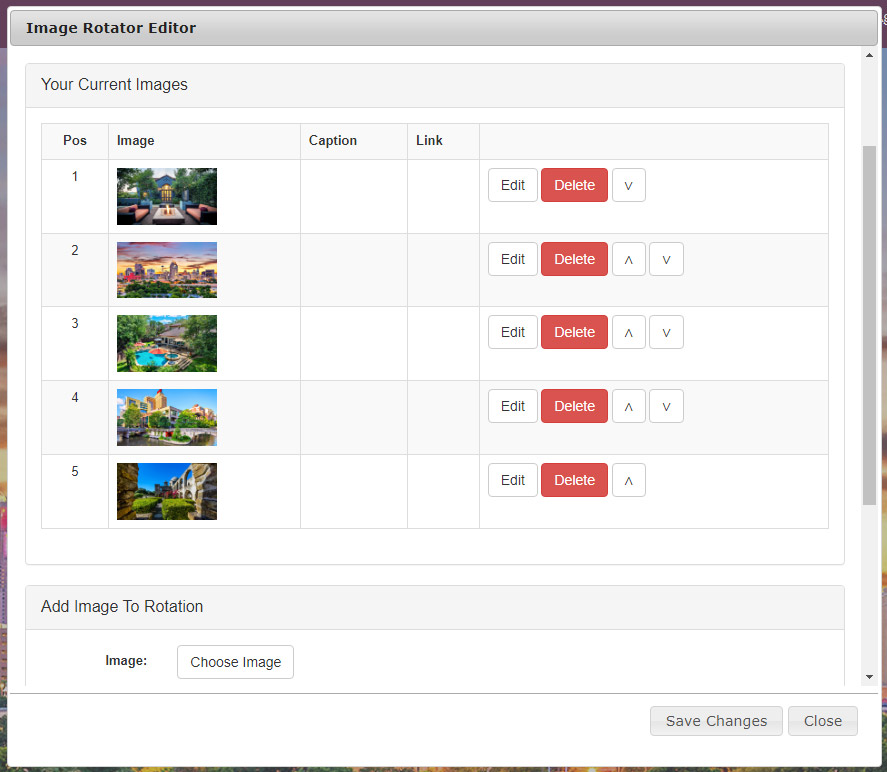
Now, you may add a photo to the rotation. You can either upload your own photo (make sure you're licensed to use your photos commercially), or choose a fully-licensed photo from our global stock image gallery.
Note: If you choose to upload your own photo, please crop/size the image to 1760x1000 pixels, with a resolution no lower than 72 dpi, in jpg format. Photos that are optimized for the web will load quicker on your website.
To upload and add your own photo:
1) Click the Choose Image button in the Add Image to Rotation section. This opens a popup window.

2) Click the Upload button in the popup window. This opens the Upload window.

3) Select your photo(s) using the available upload slots. Click the Add button to add more images.
4) Once you've selected the photos you wish to upload, click the Upload button. This closes the Upload popup and takes you back to the previous window.

5) Find and click on the image thumbnail for the photo you wish to add.
6) Click the Insert button. This closes the popup window and takes you back to the main Image Rotator Editor.
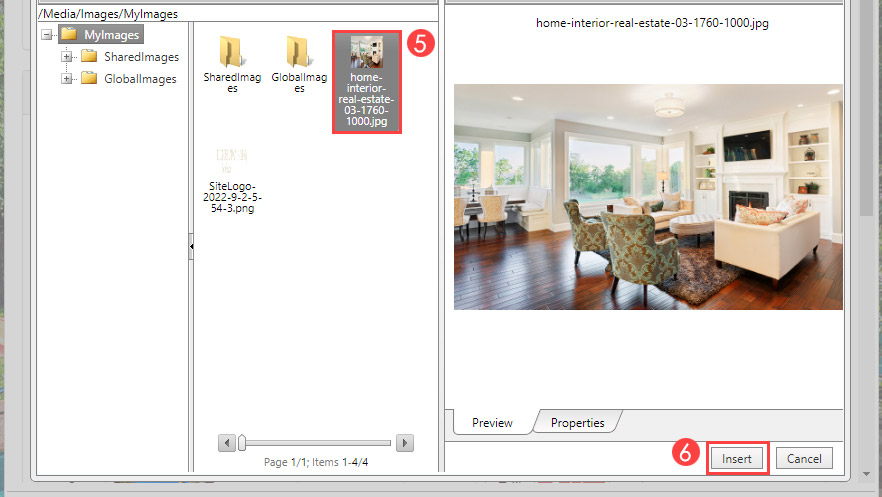
7) Click the Add Image button at the bottom of the Add Image to Rotation section.
8) Click save to commit the change and close the Image Rotator Editor.
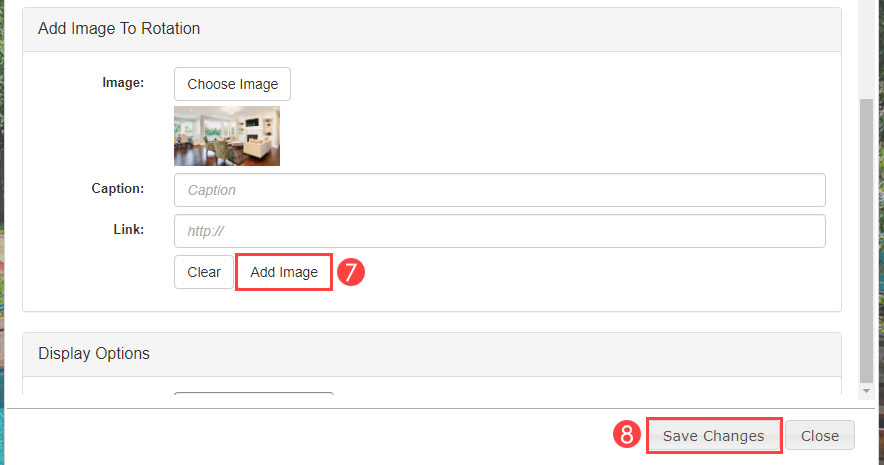
To choose a photo from the global stock image gallery:
1) Click the Choose Image button in the Add Image to Rotation section. This opens a popup window.

2) Click the GlobalImages folder to open.

3) Click on RealEstate folder to open.
4) Click on FullScreen folder to open.
5) Click on the folder that matches the style of photo you're looking to add to your rotation.
6) Browse the photos in that folder. Click on the image thumbnail for the photo you wish to add.
7) Click the Insert button. This closes the popup window and takes you back to the main Image Rotator Editor.
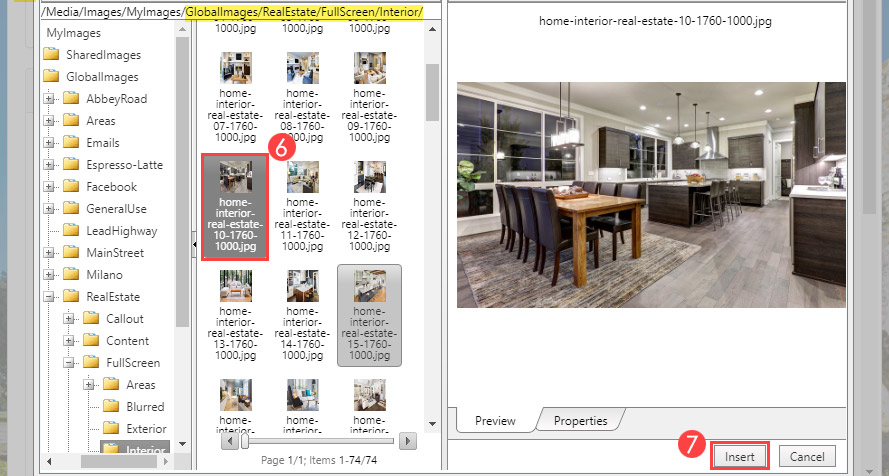
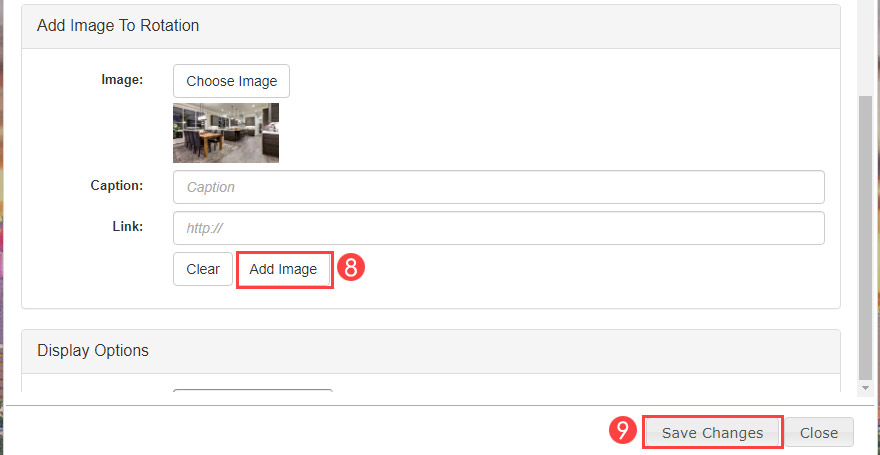
8) Click the Add Image button at the bottom of the Add Image to Rotation section.
9) Click save to commit the change and close the Image Rotator Editor.
To delete a photo from your rotation:
1) In the Your Current Images section, locate the thumbnail image for photo you wish to delete
2) Click the delete button to the right of the image
3) Click save to commit the change and close the Photo Rotator editor.
Click save. Don't forget to publish your website to complete the update on your live website.
0 Comments